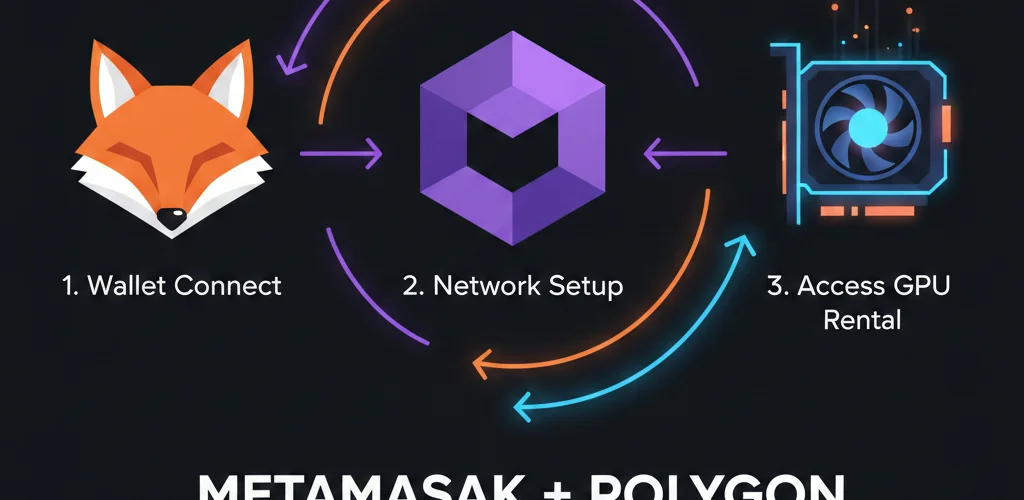
The gap between “I want to rent a GPU with crypto” and actually doing it usually comes down to one thing: wallet setup. The GPU rental itself takes thirty seconds. Getting a funded cryptocurrency wallet connected to the right network takes longer if you’ve never done it before, and most guides assume you already hold crypto and understand gas fees.
This tutorial starts from zero. No prior cryptocurrency experience required. By the end, you’ll have a MetaMask wallet connected to Polygon network with enough funds to rent your first GPU. The entire process costs under $2 in fees and takes about fifteen minutes, most of which is waiting for exchange withdrawal confirmations.
For the complete GPU rental process after wallet setup—including platform comparisons, smart contract escrow, and rental management—see our Complete Guide to Renting GPUs with Cryptocurrency.
Why Polygon Instead of Ethereum Mainnet
Before setting anything up, understanding why Polygon matters will save you money on every transaction.
The Gas Fee Problem
Every blockchain transaction requires a fee paid to network validators. On Ethereum mainnet, these fees (called “gas”) fluctuate based on network demand:
Ethereum mainnet gas costs:
- Simple transfer: $1-5
- Token approval: $2-8
- Complex transaction (escrow deposit): $5-15
- During high demand: $20-50+
For GPU rental, this creates a problem:
Imagine renting an RTX 4090 for 2 hours at $0.60/hour:
- GPU cost: $1.20
- Ethereum gas for deposit: $5.00
- Ethereum gas for withdrawal: $5.00
- Total: $11.20 for $1.20 of GPU time
Gas fees exceeding rental cost makes small transactions economically irrational.
Polygon: Same Security, 100x Lower Fees
Polygon is a “Layer 2” network built on top of Ethereum. It inherits Ethereum’s security model while processing transactions at dramatically lower cost:
Polygon gas costs:
- Simple transfer: $0.001-0.01
- Token approval: $0.005-0.02
- Complex transaction (escrow deposit): $0.01-0.05
- During high demand: $0.05-0.20
Same GPU rental scenario on Polygon:
- GPU cost: $1.20
- Polygon gas for deposit: $0.02
- Polygon gas for withdrawal: $0.02
- Total: $1.24 for $1.20 of GPU time
Gas fees become negligible rather than prohibitive.
Technical Details (For the Curious)
Polygon achieves low fees through different consensus mechanisms and batched transaction processing. The technical architecture matters less than the practical outcome:
| Network | Confirmation Time | Transaction Fee | Security |
|---|---|---|---|
| Ethereum mainnet | 15-60 seconds | $1-15 | Highest |
| Polygon | 2-5 seconds | $0.001-0.05 | High (Ethereum-secured) |
| Solana | <1 second | $0.0001-0.01 | High |
GPUFlow and other crypto-native GPU platforms use Polygon because:
- Fees don’t destroy economics of small rentals
- Fast confirmation means quick access
- Security remains strong via Ethereum anchoring
- Wide stablecoin availability (USDC, USDT)
Your Wallet Works on Both Networks
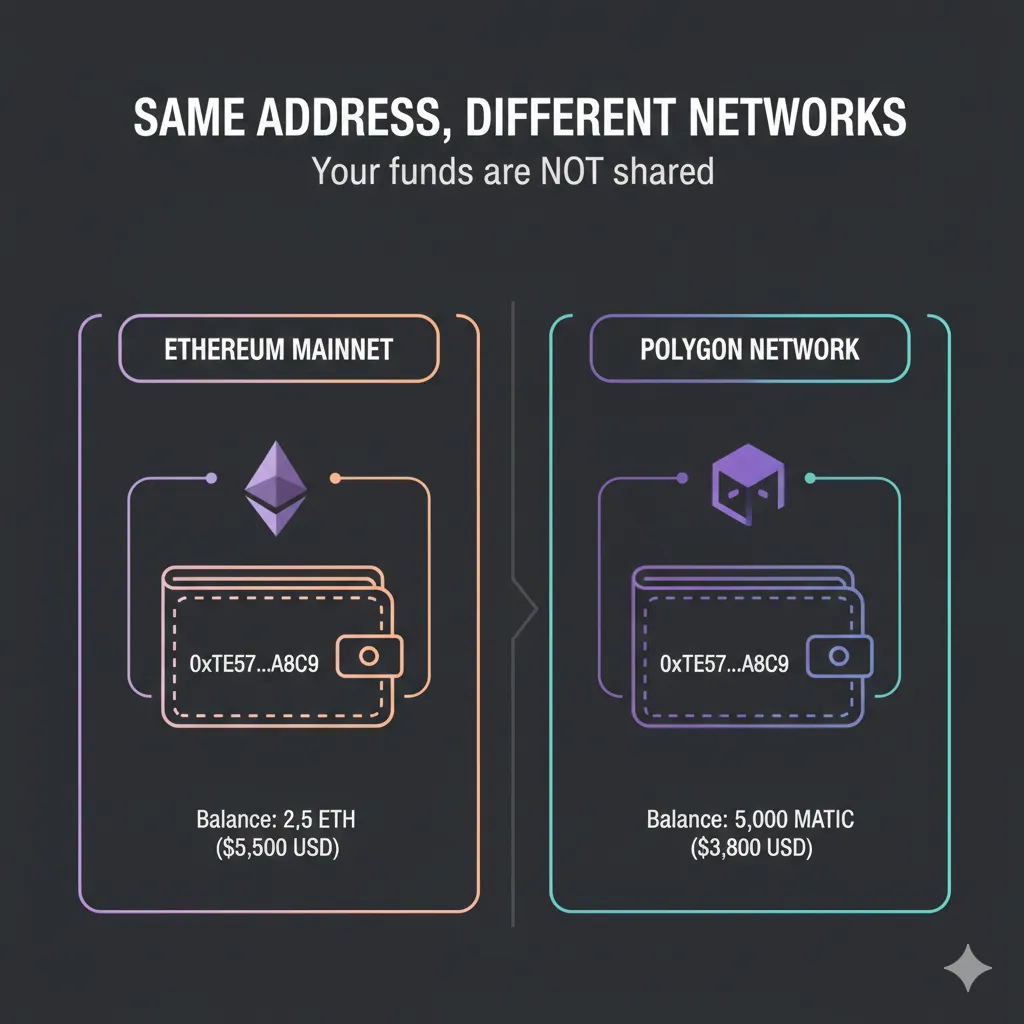
Here’s the key concept: Your MetaMask wallet address is the same on Ethereum and Polygon.
The address 0x7a3B...4f2D exists on both networks. Funds sent to that address on Polygon stay on Polygon. Funds sent on Ethereum stay on Ethereum. Same address, different networks, separate balances.
This is why network selection matters when sending funds. Sending USDC on Ethereum mainnet to your address doesn’t make those funds available on Polygon—they’re on different networks despite the identical address.
MetaMask Installation and Seed Phrase Security
MetaMask is a browser extension wallet that stores your cryptocurrency and lets you interact with blockchain applications. Installation takes about five minutes.
Step 1: Download MetaMask
Go directly to the official source:
- Open your browser (Chrome, Firefox, Brave, or Edge)
- Visit metamask.io (verify the URL carefully—phishing sites exist)
- Click “Download”
- Select your browser
- Click “Add to [Browser]” in the extension store
- Confirm installation when prompted
Warning: Only download MetaMask from metamask.io or official browser extension stores. Never install from links in emails, Discord messages, or search ads. Fake MetaMask extensions steal funds.
Step 2: Create New Wallet
After installation:
- Click the MetaMask fox icon in your browser toolbar
- Click “Get Started”
- Select “Create a new wallet”
- Agree to terms (read if you want, standard software terms)
- Create a password
This password:
- Unlocks MetaMask on this specific device
- Does NOT recover your wallet if you lose access
- Should be strong but doesn’t need to be memorized forever
- Is separate from your seed phrase (explained next)
Step 3: Secure Your Seed Phrase
This is the most critical step. Read carefully.
MetaMask will display 12 words in a specific order. These words are your “seed phrase” or “recovery phrase.”
What the seed phrase does:
- Provides complete access to your wallet from any device
- Allows recovery if your computer dies, browser crashes, or MetaMask corrupts
- Cannot be changed or reset—these 12 words are permanent for this wallet
- Anyone with these words can take all your funds instantly
What to do:
- MetaMask displays 12 words on screen
- Write them on paper in exact order (word 1, word 2… word 12)
- Do not photograph, screenshot, or type into any digital device
- Do not store in password manager, cloud drive, or notes app
- Store paper in secure location (safe, lockbox, safety deposit box)
- Consider making a second copy stored in different physical location
What NOT to do:
- Never enter seed phrase on any website (legitimate sites never ask for it)
- Never share with anyone claiming to be “support”
- Never store digitally in any form
- Never read aloud in hearing range of others or devices
Why this matters:
Unlike bank accounts, cryptocurrency wallets have no customer support, no fraud department, no transaction reversal. If someone gets your seed phrase:
- They drain your wallet in seconds
- No authority can reverse the transaction
- No recovery is possible
- Funds are permanently gone
The seed phrase is the wallet. Protect it accordingly.
Step 4: Confirm Seed Phrase
MetaMask will ask you to confirm by selecting words in order:
- Click the words in correct sequence
- This verifies you actually wrote them down
- Do not skip this by memorizing temporarily—you need the written backup
Step 5: Wallet Ready
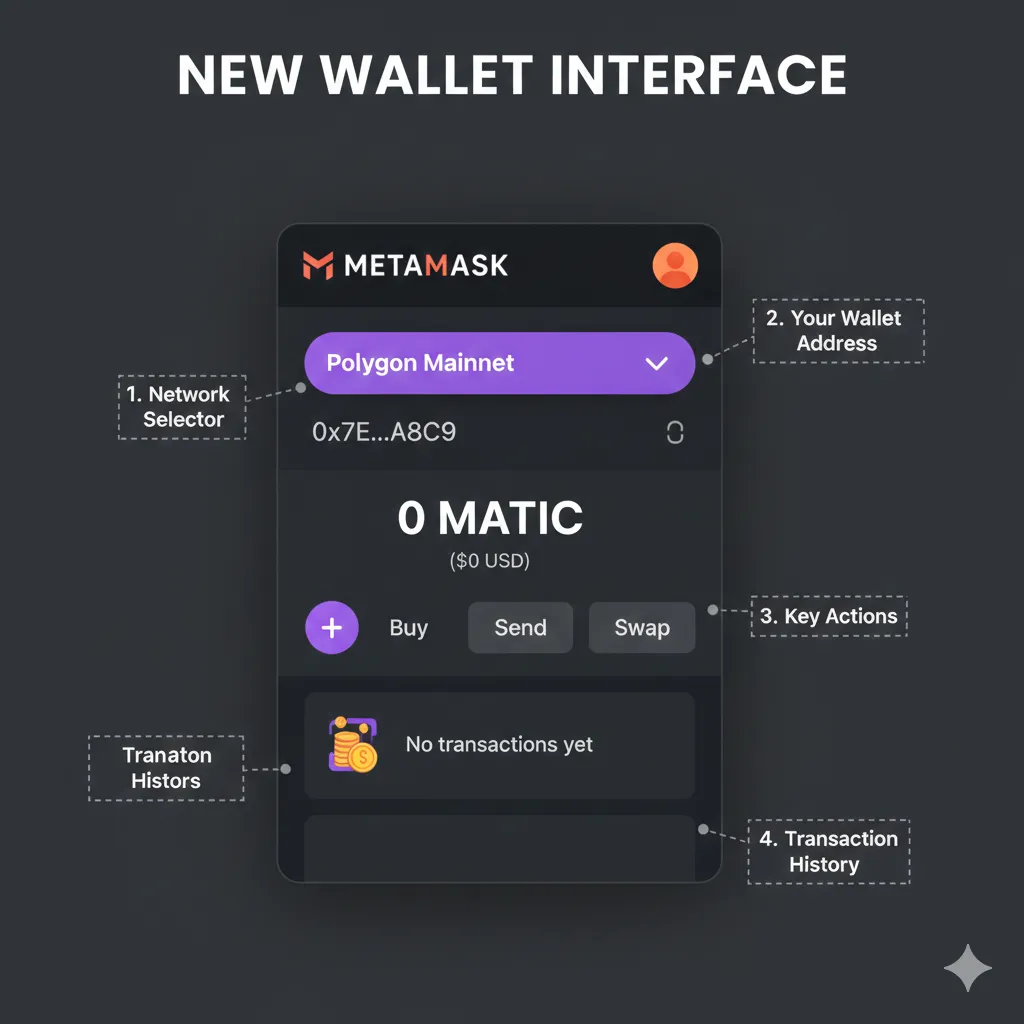
After confirmation, your wallet is created and ready to use. You’ll see:
- Your wallet address (starts with
0x, followed by 40 characters) - Balance showing 0 ETH (you haven’t funded it yet)
- Network indicator showing “Ethereum Mainnet”
Your wallet address:
- This is public—safe to share for receiving funds
- Like an email address for cryptocurrency
- Does not change and cannot be modified
- Same address works across multiple networks (Ethereum, Polygon, etc.)
Adding Polygon Network to MetaMask
MetaMask defaults to Ethereum mainnet. To use Polygon’s lower fees, you need to add the network.
Method 1: Automatic Addition (Easiest)
- Visit chainlist.org
- Search for “Polygon”
- Find “Polygon Mainnet” (Chain ID: 137)
- Click “Add to MetaMask”
- MetaMask popup appears—click “Approve”
- Click “Switch to Network” to activate Polygon
Done. Polygon is now available in your network dropdown.
Method 2: Manual Addition
If chainlist.org doesn’t work, add manually:
- Click MetaMask extension icon
- Click network dropdown (shows “Ethereum Mainnet”)
- Click “Add network”
- Click “Add a network manually”
- Enter these exact details:
Network Name: Polygon Mainnet
New RPC URL: https://polygon-rpc.com
Chain ID: 137
Currency Symbol: MATIC
Block Explorer URL: https://polygonscan.com
- Click “Save”
- Polygon appears in your network list
Switching Between Networks
After adding Polygon:
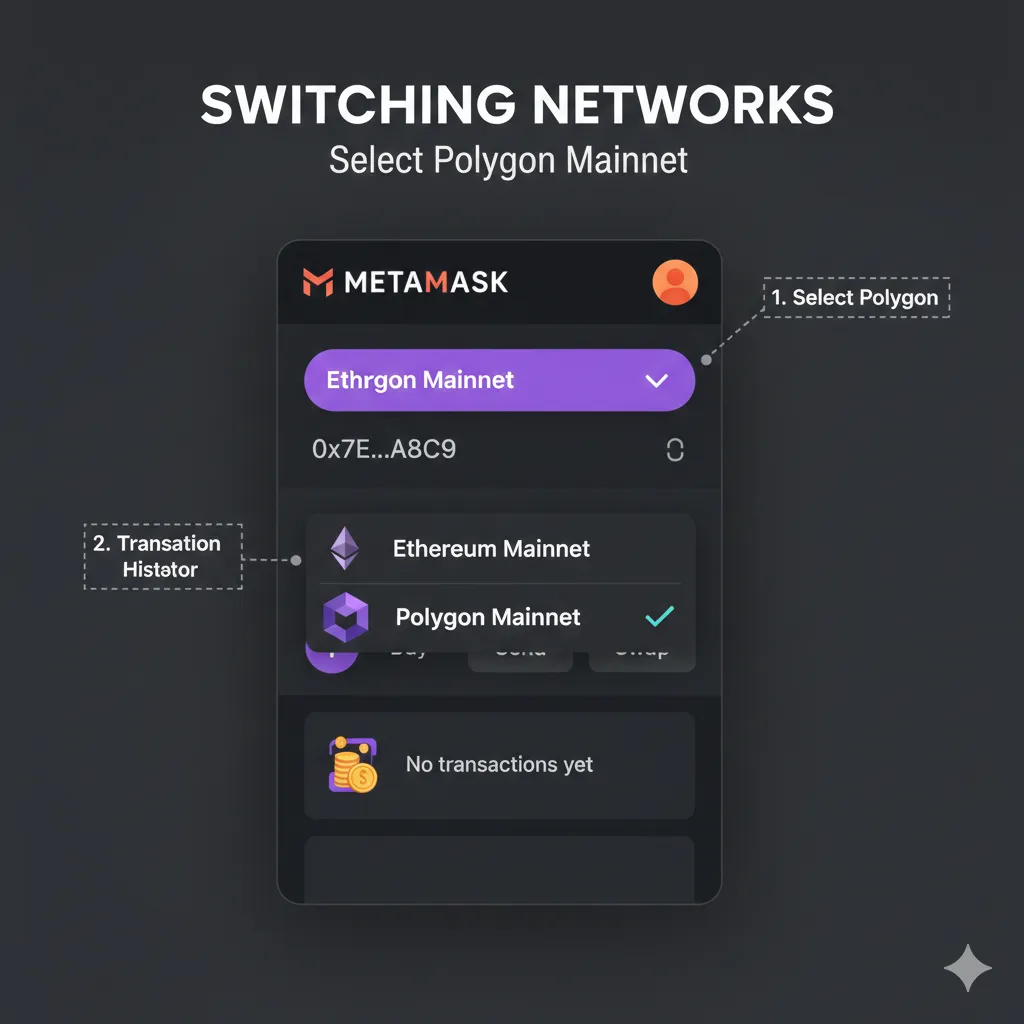
- Click network dropdown in MetaMask (top center of extension)
- Select “Polygon Mainnet” or “Ethereum Mainnet”
- Your balance display changes to show funds on selected network
Remember: Same address, different networks. Funds on Ethereum aren’t visible when viewing Polygon, and vice versa. You’re looking at the same mailbox but different post offices.
Verify Network Addition
Confirm Polygon is working:
- Switch to Polygon Mainnet
- Balance should show “0 MATIC” (you haven’t funded it)
- Small Polygon logo appears next to network name
- Address remains the same as on Ethereum
If you see errors about RPC connections:
- Try alternative RPC URL:
https://rpc-mainnet.matic.quiknode.pro - Or:
https://polygon-bor.publicnode.com - Network congestion occasionally causes RPC issues
Funding Your Wallet with USDC
Your wallet exists but contains nothing. This section covers getting USDC (the recommended stablecoin for GPU rental) into your MetaMask wallet on Polygon network.
Why USDC for GPU Rental
Stablecoins eliminate price volatility:
- USDC maintains 1:1 peg with US dollar
- $100 USDC today equals $100 USDC tomorrow
- No risk of cryptocurrency price swings affecting your GPU budget
Compare to volatile cryptocurrencies:
- Deposit $100 of ETH for GPU rental
- ETH drops 10% overnight
- Your remaining balance buys 10% less GPU time
- Price moved against you through no action of your own
USDC avoids this entirely. Your GPU rental budget stays stable regardless of market conditions.
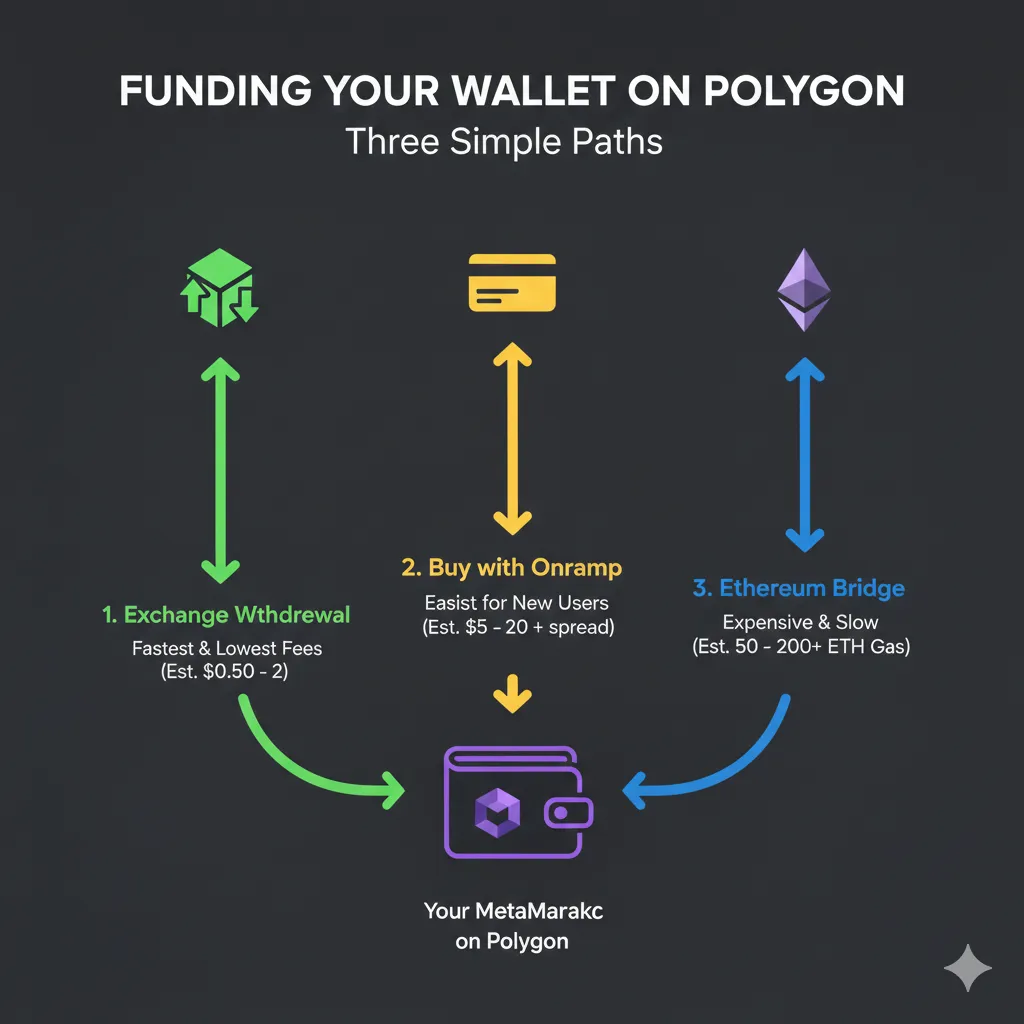
Funding Method 1: Withdraw from Exchange (Recommended)
If you already have cryptocurrency on an exchange (Coinbase, Binance, Kraken, etc.), withdrawing directly to Polygon is the cheapest option.
Step-by-step for Coinbase:
- Log into Coinbase
- Navigate to USDC balance
- Click “Send”
- Enter your MetaMask wallet address (copy from MetaMask)
- Critical: Select “Polygon” as the network
- Enter amount to send
- Review fees (typically $0.10-1.00 for Polygon withdrawal)
- Confirm withdrawal
- Wait for confirmation (usually 1-10 minutes)
Step-by-step for Binance:
- Log into Binance
- Navigate to Wallet → Spot Wallet
- Find USDC, click “Withdraw”
- Paste your MetaMask wallet address
- Critical: Select “MATIC” or “Polygon” network
- Enter amount
- Complete security verification
- Wait for confirmation (usually 5-15 minutes)
Common exchanges supporting Polygon USDC withdrawal:
| Exchange | Polygon Support | Typical Fee |
|---|---|---|
| Coinbase | Yes | $0.10-0.50 |
| Binance | Yes | $0.10-0.30 |
| Kraken | Yes | $0.10-0.50 |
| Crypto.com | Yes | $0.10-0.25 |
| KuCoin | Yes | $0.10-0.30 |
| OKX | Yes | $0.10-0.20 |
If your exchange doesn’t support Polygon withdrawal:
You have two options:
- Withdraw on Ethereum, then bridge to Polygon (costs more in gas)
- Use a different exchange that supports Polygon
Bridging from Ethereum costs $5-15 in gas fees. Using an exchange with native Polygon support costs $0.10-0.50. The choice is obvious for small amounts.
Funding Method 2: Direct Purchase via Onramp
If you don’t have cryptocurrency anywhere, onramp services let you buy directly with credit card or bank transfer.
Popular onramp services:
| Service | Payment Methods | Fees | Polygon Support |
|---|---|---|---|
| Transak | Card, bank | 1-3% | Yes |
| MoonPay | Card, bank | 2-4% | Yes |
| Ramp | Card, bank | 1-3% | Yes |
| Banxa | Card, bank | 2-4% | Yes |
Step-by-step using Transak:
- Visit transak.com
- Select “Buy”
- Choose USDC as the cryptocurrency
- Select Polygon as the network
- Enter amount in your local currency
- Click “Buy Now”
- Connect MetaMask wallet or paste address
- Complete payment (card or bank)
- USDC arrives directly in your MetaMask on Polygon
Fees are higher than exchange withdrawal (1-4% vs $0.10-0.50 flat), but onramps are convenient if you’re starting from zero cryptocurrency holdings.
Funding Method 3: MetaMask Built-in Purchase
MetaMask includes purchase functionality through partner services:
- Open MetaMask
- Ensure Polygon network is selected
- Click “Buy”
- Select payment method
- Choose amount
- Complete purchase through partner (Transak, MoonPay, etc.)
Same fees as direct onramp since MetaMask routes through the same services, but slightly more convenient integration.
Funding Method 4: Bridge from Ethereum
If you have USDC on Ethereum mainnet and cannot withdraw directly to Polygon from your exchange:
Using official Polygon Bridge:
- Visit portal.polygon.technology/bridge
- Connect MetaMask
- Select “Deposit” (Ethereum → Polygon)
- Choose USDC
- Enter amount
- Approve USDC spending (gas cost: $2-8)
- Confirm bridge transaction (gas cost: $5-15)
- Wait 15-30 minutes for completion
- USDC appears in wallet on Polygon
Total Ethereum gas cost: $7-23 depending on network congestion.
This is the expensive option. Only use bridging if:
- Your exchange doesn’t support Polygon withdrawal
- You already have USDC stuck on Ethereum
- Amount is large enough that bridge fees are proportionally small
For amounts under $200, finding an exchange with Polygon support is more economical than bridging.
Verify Funds Arrived
After any funding method:
- Open MetaMask
- Ensure Polygon network is selected (common mistake: checking wrong network)
- Click “Import tokens” if USDC doesn’t appear automatically
- USDC contract on Polygon:
0x3c499c542cEF5E3811e1192ce70d8cC03d5c3359 - Balance should reflect your deposit
If funds don’t appear:
- Confirm transaction completed on sender side (exchange, onramp)
- Verify you’re viewing Polygon network in MetaMask
- Check transaction on Polygonscan using your wallet address
- Some tokens require manual import (add token using contract address)
Getting MATIC for Gas Fees
You have USDC for GPU rental, but you can’t transact yet. Every Polygon transaction requires a small amount of MATIC to pay gas fees—even transactions involving other tokens like USDC.
Why You Need MATIC
Blockchain fee structure:
- Gas fees must be paid in network’s native currency
- Polygon’s native currency is MATIC
- Even if paying for GPU rental in USDC, the transaction itself costs MATIC
- No MATIC = cannot send transactions
The amount needed is tiny:
| Action | Approximate MATIC Cost | USD Equivalent |
|---|---|---|
| Send USDC | 0.001-0.01 MATIC | $0.001-0.01 |
| Approve token spending | 0.005-0.02 MATIC | $0.005-0.02 |
| Deposit to GPU platform | 0.01-0.05 MATIC | $0.01-0.05 |
| Complex transaction | 0.02-0.10 MATIC | $0.02-0.10 |
$1-2 worth of MATIC covers dozens of transactions. You don’t need much, but you need some.
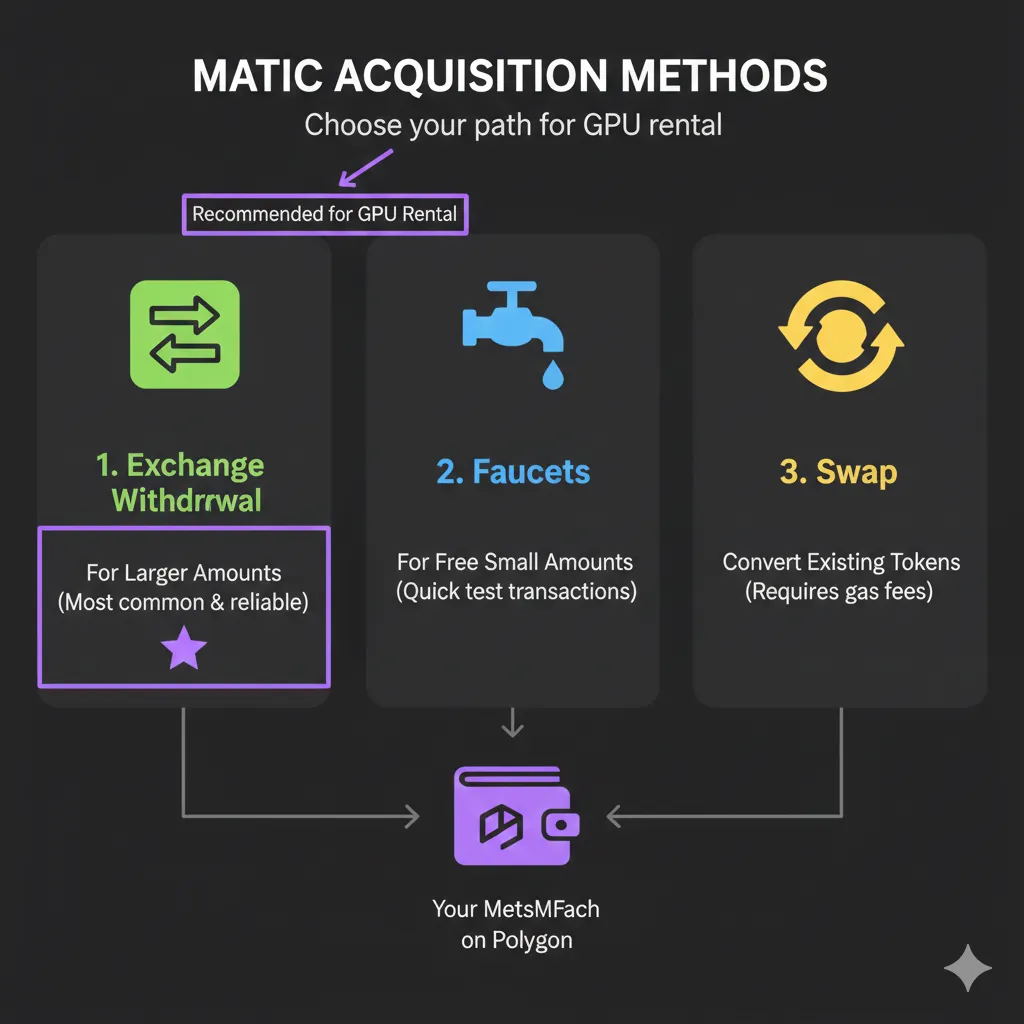
Method 1: Withdraw MATIC from Exchange
Same process as USDC withdrawal:
- On your exchange, find MATIC
- Click “Withdraw”
- Enter MetaMask address
- Select Polygon network (some exchanges call it “MATIC”)
- Withdraw small amount ($2-5 worth)
- MATIC arrives in wallet
Most major exchanges support MATIC withdrawal on Polygon. Fees are typically $0.01-0.10.
Method 2: Use a Faucet
Faucets provide small amounts of MATIC for free, intended for new users who need gas to get started.
Available faucets:
| Faucet | Amount | Frequency |
|---|---|---|
| Polygon Faucet (faucet.polygon.technology) | 0.001-0.002 MATIC | Daily |
| Alchemy Faucet (alchemy.com/faucets/polygon-mainnet) | 0.5 MATIC | Per account |
| QuickNode Faucet | Variable | Limited |
Using Alchemy faucet (recommended):
- Visit alchemy.com/faucets/polygon-mainnet
- Create free Alchemy account (or sign in)
- Paste your MetaMask wallet address
- Click “Send Me MATIC”
- 0.5 MATIC arrives within minutes
0.5 MATIC is enough for approximately 50-100 transactions—sufficient for months of typical GPU rental usage.
Method 3: Swap USDC to MATIC
If you have USDC but no MATIC, use MetaMask’s built-in swap:
- Open MetaMask on Polygon network
- Click “Swap”
- Select USDC as “from” token
- Select MATIC as “to” token
- Enter small amount ($1-2 worth)
- Review rate and fees
- Click “Swap”
Problem: This swap itself requires MATIC for gas. If you have exactly zero MATIC, you can’t execute the swap.
Solution for zero MATIC situation:
- Use faucet first to get minimal MATIC
- Some swap aggregators offer “gasless” swaps where they front the gas
- Ask someone to send you 0.01 MATIC (community members often help newcomers)
Method 4: Gas Sponsorship
Some platforms sponsor gas fees for new users:
GPUFlow approach:
GPUFlow detects when users have USDC but insufficient MATIC and offers to sponsor the first transaction’s gas fee. This allows users to:
- Deposit USDC to platform
- Platform covers gas cost for initial deposit
- User can later withdraw small MATIC from platform balance if needed
Other sponsorship options:
- Some DeFi protocols sponsor gas for first-time users
- Community faucets in Discord servers
- Layer 2 onramps that include small MATIC with USDC purchases
How Much MATIC to Keep
Recommended MATIC balance for GPU rental:
| Usage Level | MATIC Balance | USD Value | Lasts |
|---|---|---|---|
| Light (few rentals/month) | 0.5 MATIC | ~$0.50 | 3-6 months |
| Moderate (weekly rentals) | 2 MATIC | ~$2.00 | 6-12 months |
| Heavy (daily transactions) | 5 MATIC | ~$5.00 | 6-12 months |
You don’t need much. Even heavy users rarely need more than $5 worth of MATIC for gas over many months of usage. The per-transaction cost is so low that MATIC balance depletes very slowly.
Verify MATIC Balance
- Open MetaMask
- Select Polygon network
- MATIC balance shows at top (it’s the native currency, always visible)
- Confirm balance is greater than 0
With both USDC and MATIC in your wallet, you’re ready to connect to GPU platforms.
Connecting Your Wallet to GPU Rental Platforms
Your wallet is funded. Now connect it to a GPU rental platform. This section explains what happens during connection and what permissions you’re granting.
Understanding Wallet Connection
When a website requests wallet connection, you’re granting limited access:
What connection DOES allow:
- Website can see your wallet address
- Website can see your token balances
- Website can request transactions (which you must approve individually)
What connection does NOT allow:
- Website cannot move funds without your approval
- Website cannot sign transactions automatically
- Website cannot access your private keys or seed phrase
Wallet connection is like showing your ID, not handing over your keys. The website learns who you are (your address) but cannot act as you.
Connecting to GPUFlow
Step-by-step:
- Visit gpuflow.app
- Ensure MetaMask is set to Polygon network
- Click “Connect Wallet” (usually top right)
- MetaMask popup appears showing connection request
- Verify the website URL is correct (phishing protection)
- Click “Connect”
- Your wallet address now appears on the site
What happened:
- GPUFlow can now display your USDC balance
- GPUFlow can prepare transactions for you to sign
- GPUFlow cannot access your funds without explicit approval
Understanding Transaction Approvals
After connecting, you’ll encounter two types of transactions:
Type 1: Token Approval
Before a platform can use your USDC, you must “approve” the token for their smart contract:
MetaMask popup shows:
"Give permission to access your USDC?"
Requested by: gpuflow.app
For contract: 0x7a3B...
What this means:
- You’re allowing the specified contract to transfer USDC from your wallet
- Only that specific contract can use this permission
- You can revoke this permission later
- Common to approve “unlimited” amount for convenience (avoids repeated approvals)
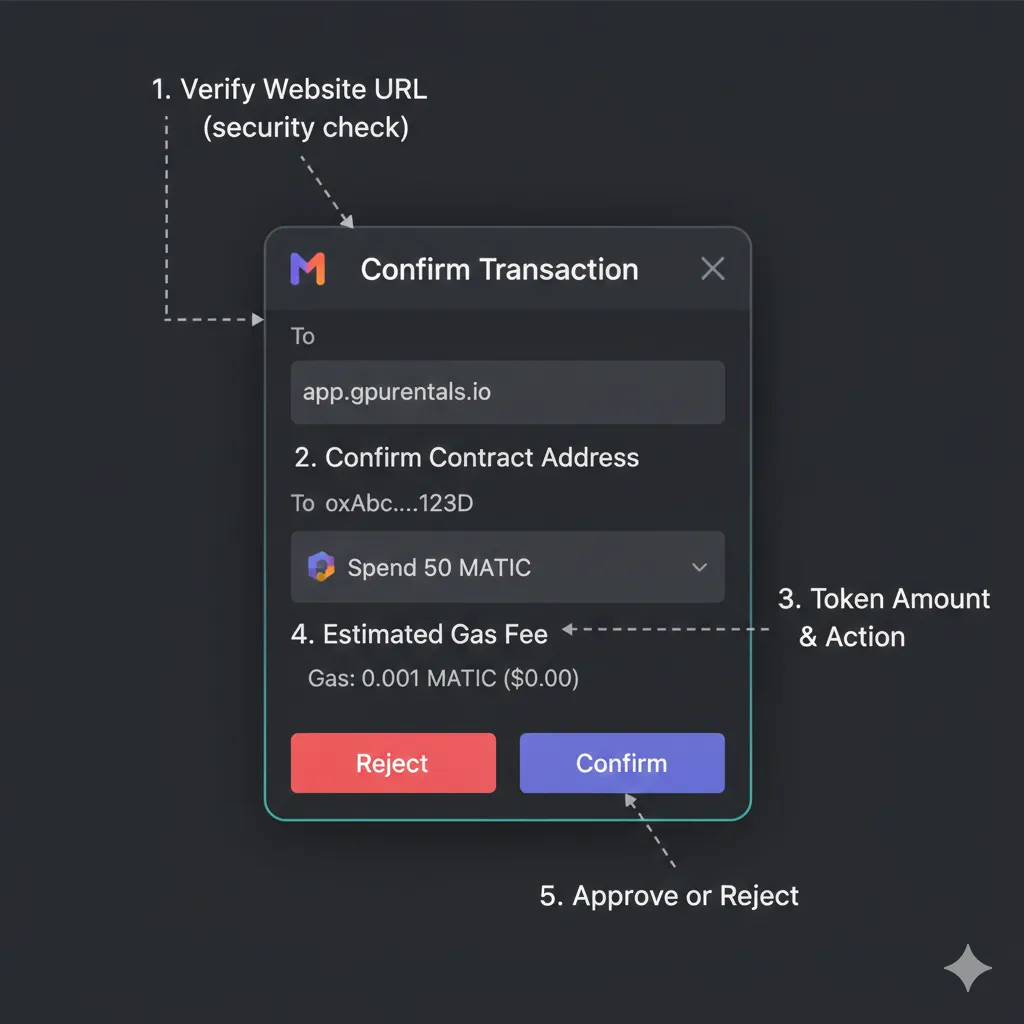
Type 2: Transaction Confirmation
When you actually deposit, rent, or withdraw:
MetaMask popup shows:
"Confirm transaction"
Action: Deposit 50 USDC to escrow
Gas fee: 0.02 MATIC (~$0.02)
What this means:
- You’re authorizing a specific action with specific amounts
- The gas fee shown will be deducted from your MATIC balance
- Clicking “Confirm” executes the transaction on blockchain
- Transaction is irreversible once confirmed
Security Best Practices
Before connecting to any site:
- Verify URL: Check spelling carefully (gpuflow.app vs gpufl0w.app)
- Check certificate: Look for https:// and valid certificate
- Bookmark legitimate sites: Avoid searching and clicking ads
When approving transactions:
- Read what you’re approving: Token amount, recipient contract
- Verify gas fees are reasonable: Polygon transactions should be under $0.10
- Check network: Confirm you’re on expected network (Polygon)
- Don’t rush: Take time to verify details
Periodic maintenance:
- Review approvals: Visit revoke.cash to see all token approvals
- Revoke unused approvals: Remove permissions for platforms you no longer use
- Use separate wallets: Consider dedicated wallet for GPU rental with limited funds
Connecting to Other Platforms
Vast.ai with cryptocurrency:
- Create Vast.ai account (email required)
- Navigate to Billing
- Click “Add Credit” → “Cryptocurrency”
- Select crypto type
- Complete payment via CoinPayments gateway
- No direct wallet connection needed (payment via gateway)
RunPod with cryptocurrency:
- Create RunPod account
- Navigate to Billing
- Click “Add Funds” → “Crypto”
- Select crypto type
- Complete payment via Coinbase Commerce
- No direct wallet connection needed
Note: Vast.ai and RunPod use payment gateways rather than direct wallet connection. You send crypto to a provided address rather than connecting your wallet to their site. This is a different model than GPUFlow’s direct wallet integration.
For comprehensive comparison of how different platforms handle cryptocurrency payments, see our Complete Guide to Renting GPUs with Cryptocurrency.
What Each Permission Means
| Permission Request | What It Allows | Risk Level |
|---|---|---|
| ”Connect wallet” | See your address and balances | Very Low |
| ”Approve [token]“ | Contract can transfer approved token | Low-Medium |
| ”Unlimited approval” | Contract can transfer any amount of token | Medium |
| ”Sign message” | Prove you own the wallet | Very Low |
| ”Send transaction” | Execute specific blockchain action | Depends on action |
Red flags to reject:
- Approval requests for tokens you don’t intend to use
- Transaction amounts different from what you expected
- Gas fees dramatically higher than normal (wrong network?)
- Requests for seed phrase (NEVER legitimate)
- Signing messages for unfamiliar purposes
Troubleshooting Common Issues
Even straightforward setups encounter problems. This section addresses the most common issues new users face.
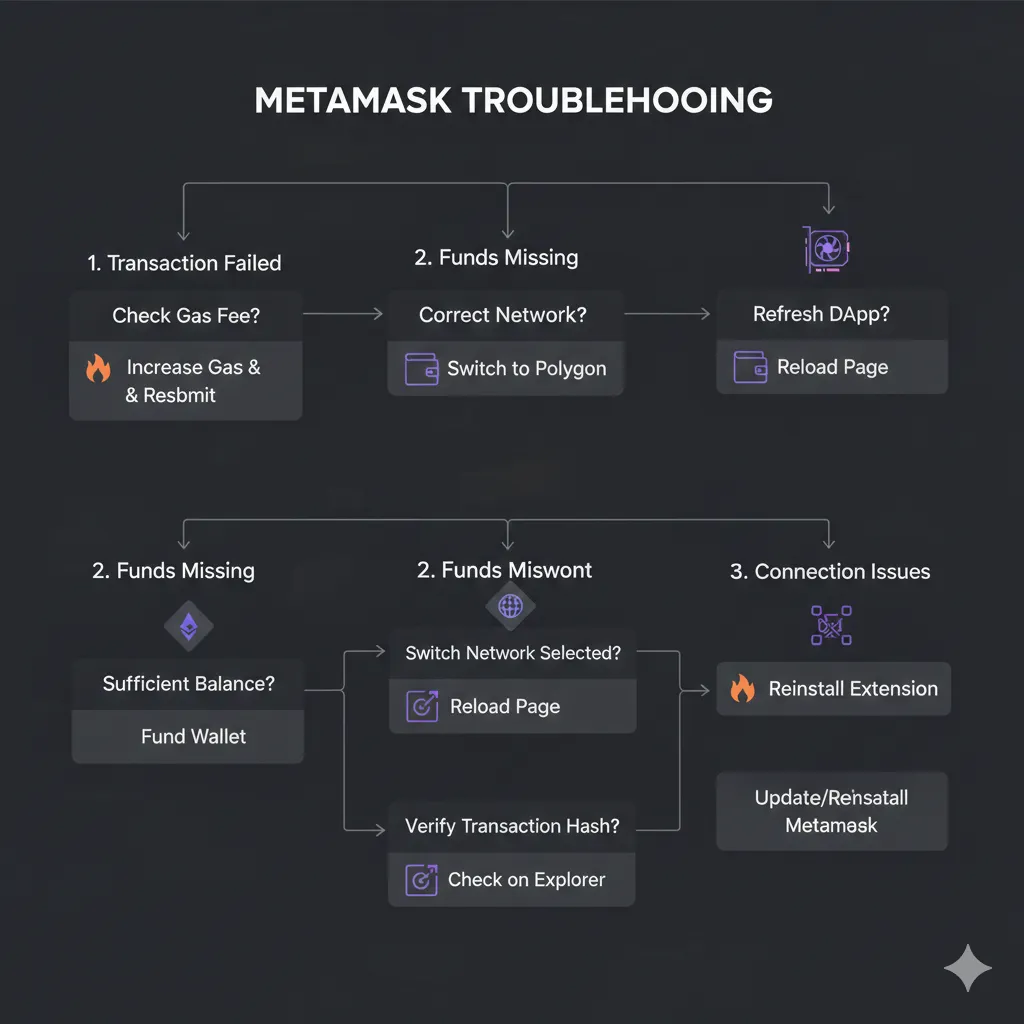
”Transaction Failed” Errors
Symptom: Transaction shows failed status in MetaMask after confirmation attempt.
Common causes and solutions:
Insufficient MATIC for gas:
- Error message often mentions “insufficient funds for gas”
- You have USDC but no MATIC
- Solution: Acquire MATIC using faucet or exchange withdrawal
Insufficient token balance:
- Trying to send more USDC than you have
- Remember: Gas fees reduce available MATIC, not USDC
- Solution: Reduce transaction amount or add more tokens
Slippage too low (for swaps):
- Price moved between quote and execution
- Solution: Increase slippage tolerance in swap settings (1-3% usually sufficient)
Nonce issues:
- Previous transaction stuck, blocking subsequent transactions
- Solution: In MetaMask settings, Advanced → Reset Account (doesn’t lose funds)
Funds Not Appearing
Symptom: You sent funds but wallet shows zero balance.
Check these in order:
1. Correct network selected?
- Most common issue: Viewing Ethereum when funds are on Polygon (or vice versa)
- Click network dropdown, switch to correct network
- Same address, different networks = different balances
2. Transaction actually completed?
- Check sender side (exchange, other wallet)
- Find transaction hash
- Search on appropriate block explorer:
- Polygon: polygonscan.com
- Ethereum: etherscan.io
- Confirm transaction shows “Success” status
3. Token needs importing?
- Some tokens don’t appear automatically
- Click “Import tokens” in MetaMask
- Paste token contract address:
- USDC on Polygon:
0x3c499c542cEF5E3811e1192ce70d8cC03d5c3359
- USDC on Polygon:
- Token should appear after import
4. Sent to wrong network?
- Sent on Ethereum but expected on Polygon?
- Funds are not lost—they’re on different network
- Switch MetaMask to the network you actually sent on
- Bridge funds to intended network if needed
MetaMask Connection Issues
Symptom: Website won’t connect to MetaMask or connection drops.
Solutions:
Refresh and retry:
- Refresh the webpage
- Click “Connect Wallet” again
- Approve in MetaMask popup
Check MetaMask is unlocked:
- Click MetaMask icon
- Enter password if locked
- Retry connection
Disable conflicting extensions:
- Other wallet extensions can interfere
- Temporarily disable Phantom, Coinbase Wallet, etc.
- Retry connection with only MetaMask active
Try different browser:
- Browser-specific issues exist
- Try Chrome, Firefox, or Brave
- Reinstall MetaMask extension if persistent
Clear MetaMask connection:
- In MetaMask: Settings → Connections
- Find the problematic site
- Click “Disconnect”
- Reconnect fresh
Wrong Network Errors
Symptom: Site shows “Wrong network” or “Please switch to Polygon.”
Solution:
- Click network dropdown in MetaMask
- Select “Polygon Mainnet”
- If Polygon not listed, add it (see earlier section)
- Refresh website page
- Reconnect wallet if needed
Most GPU platforms display a prompt to switch networks automatically. Click “Switch Network” in the MetaMask popup when prompted.
Gas Estimation Failed
Symptom: MetaMask shows “Gas estimation failed” when trying to transact.
Common causes:
Contract rejecting transaction:
- Insufficient token balance for the operation
- Trying to interact with incompatible contract
- Platform maintenance or issues
Network congestion:
- Rare on Polygon but possible
- Wait a few minutes and retry
Solution approach:
- Verify you have sufficient balance for intended action
- Verify you’re on correct network
- Try smaller transaction amount
- Check platform status (Discord, Twitter) for known issues
- Try again later if network congestion suspected
Stuck Pending Transaction
Symptom: Transaction shows “Pending” for extended time (more than 5 minutes on Polygon).
Normal pending times:
- Polygon: 5-30 seconds
- Ethereum: 30 seconds - 5 minutes
- Longer indicates a problem
Solutions:
Speed up transaction:
- Click pending transaction in MetaMask
- Click “Speed Up”
- Increase gas price
- Confirm new transaction
- Higher gas replaces stuck transaction
Cancel transaction:
- Click pending transaction
- Click “Cancel”
- Confirm cancellation (costs gas)
- Original transaction abandoned
Last resort - Reset account:
- MetaMask Settings → Advanced
- Click “Reset Account”
- Clears transaction history and nonce
- Does NOT affect balances
- Retry original transaction
Recovery Scenarios
Lost password (but have seed phrase):
- Uninstall MetaMask
- Reinstall MetaMask
- Select “Import using Secret Recovery Phrase”
- Enter your 12 words
- Create new password
- Wallet restored with all funds
Lost seed phrase (but have MetaMask access):
- Open MetaMask while you still have access
- Settings → Security & Privacy
- Click “Reveal Secret Recovery Phrase”
- Enter password
- Write down seed phrase properly this time
- Store securely
Lost both password and seed phrase:
- Funds are permanently lost
- No recovery possible
- No support team can help
- This is why seed phrase backup is critical
Conclusion: Ready to Rent
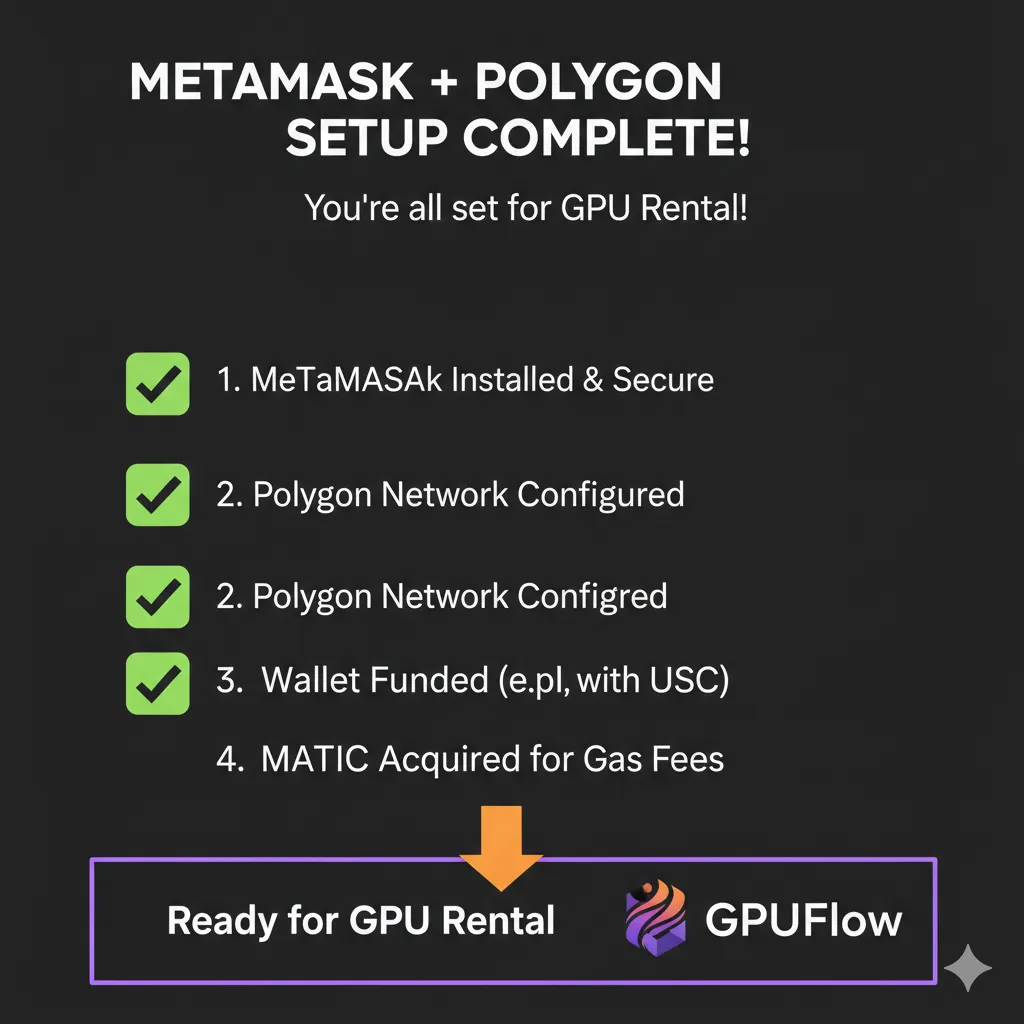
You now have everything needed for cryptocurrency-based GPU rental:
- ✅ MetaMask wallet installed and secured
- ✅ Polygon network configured for low fees
- ✅ USDC funded for stable GPU rental payments
- ✅ MATIC available for transaction gas fees
- ✅ Understanding of wallet connections and permissions
Quick Reference Checklist
Before your first GPU rental, confirm:
Wallet Setup:
- MetaMask installed from official source (metamask.io)
- Seed phrase written on paper and stored securely
- Password created for local access
Network Configuration:
- Polygon Mainnet added to MetaMask
- Can switch between Ethereum and Polygon networks
Funding:
- USDC balance on Polygon (check correct network)
- MATIC balance for gas fees (at least 0.1 MATIC)
Security:
- Seed phrase stored offline, never digitally
- Bookmark legitimate platform URLs
- Understand approval vs. transaction confirmation
What Comes Next
With wallet ready, the GPU rental process itself is fast:
- Connect: Visit gpuflow.app, connect MetaMask
- Deposit: Transfer USDC to platform escrow
- Select: Choose GPU matching your requirements
- Rent: Confirm rental, receive access credentials
- Work: Access GPU via SSH or web terminal
- Complete: End rental, unused funds return automatically
Total time from wallet ready to GPU access: Under 2 minutes
For the complete GPU rental walkthrough including platform selection, escrow mechanics, and cost optimization, see our Complete Guide to Renting GPUs with Cryptocurrency.
Common First-Timer Mistakes to Avoid
Don’t:
- Store seed phrase digitally (screenshots, cloud, notes app)
- Send funds without verifying network matches
- Approve transactions without reading details
- Keep large balances on any single platform
- Ignore gas fee requirements (need MATIC, not just USDC)
Do:
- Start with small test transactions
- Verify website URLs before connecting
- Keep modest MATIC balance for gas
- Bookmark legitimate platform sites
- Join platform Discord for community support
Estimated Total Setup Costs
| Item | Cost |
|---|---|
| MetaMask installation | Free |
| Polygon network setup | Free |
| USDC for GPU rental | Your choice ($20-100 typical start) |
| MATIC for gas | $0.50-2.00 (or free via faucet) |
| Exchange withdrawal fee | $0.10-0.50 |
| Total to get started | ~$1-3 in fees + your GPU budget |
Compare to traditional cloud provider setup costs of $0 direct fees but hours of verification time and ongoing higher platform fees.
Related Resources
From this site:
- Complete Guide to Renting GPUs with Cryptocurrency — Full rental walkthrough from platform selection to rental completion
- How to Rent GPUs Without KYC or Identity Verification — Privacy-focused GPU rental options
- Hidden Fees in GPU Rental: How Crypto Saves International Users Money — Cost analysis for international users
External resources:
- MetaMask Support — Official documentation and troubleshooting
- Polygon Documentation — Network technical details
- Polygonscan — Block explorer for transaction verification
Frequently Asked Questions
Why do I need MetaMask for GPU rental?
MetaMask is a cryptocurrency wallet that stores your funds and lets you interact with blockchain-based platforms. GPU rental platforms using cryptocurrency payments require a wallet to hold your funds and approve transactions. When you rent a GPU on platforms like GPUFlow, your payment goes into smart contract escrow—MetaMask is how you authorize that deposit and later receive unused funds back. MetaMask is recommended because it’s the most widely compatible wallet, working with nearly all cryptocurrency-accepting platforms. It installs as a browser extension, takes about 5 minutes to set up, and is free to use.
Why use Polygon instead of Ethereum for GPU rental?
Polygon offers dramatically lower transaction fees—$0.001-0.05 per transaction compared to Ethereum’s $1-10 or more. For GPU rental, where you might deposit funds, start a rental, stop a rental, and withdraw remaining balance (four transactions minimum), Ethereum gas fees could easily exceed the cost of short GPU rentals. A 2-hour rental costing $1.20 on an RTX 4090 would require $10-20 in Ethereum gas fees, making it economically irrational. The same workflow on Polygon costs under $0.10 in total fees. GPU platforms like GPUFlow use Polygon specifically because low fees make small and medium transactions practical.
What is a seed phrase and why is it so important?
A seed phrase (also called recovery phrase or secret recovery phrase) is a sequence of 12 or 24 words that provides complete access to your cryptocurrency wallet. These words, in their exact order, mathematically derive your private keys. Anyone who has these words can access all funds in the wallet from any device, anywhere in the world. There is no password reset, no identity verification, no support team that can help if you lose your seed phrase—it is the only way to recover a wallet if your device fails. You must write it on paper, never store it digitally, and keep it in a secure physical location. Loss of seed phrase with device failure means permanent, irrecoverable loss of all funds.
How much MATIC do I need for gas fees?
Very little. Polygon transaction fees are approximately $0.001-0.05 per transaction, so $0.50-2.00 worth of MATIC (approximately 0.5-2 MATIC at current prices) provides enough gas for 50-200+ transactions. This covers months of typical GPU rental usage including deposits, rentals, and withdrawals. You need MATIC specifically for gas even when paying for GPU rental in USDC, because blockchain transaction fees must be paid in the network’s native currency. If you’re just starting, getting 0.5 MATIC from a faucet (free) is sufficient for initial transactions, and you can acquire more later if needed.
Can I use a wallet other than MetaMask?
Yes. Alternatives include Rainbow (excellent mobile experience), Coinbase Wallet (convenient for Coinbase users), Rabby (developer-friendly features), Trust Wallet (mobile-focused), and hardware wallets like Ledger with browser extension integration. GPU rental platforms typically support any wallet compatible with WalletConnect protocol or direct Ethereum-compatible browser extension connection. MetaMask is recommended for beginners because of extensive documentation, widest compatibility across platforms, largest user community for troubleshooting help, and longest track record. Once comfortable with cryptocurrency, you might explore alternatives that better match your preferences.
What if I send funds to the wrong network?
Funds sent to the wrong network are not lost—they’re just on a different network than expected. Your wallet address is the same on Ethereum and Polygon, so funds sent to your address on either network belong to you. If you sent USDC on Ethereum but expected it on Polygon: switch MetaMask to Ethereum Mainnet, and you’ll see the funds there. To move them to Polygon, use a bridge (portal.polygon.technology) which costs Ethereum gas fees ($5-15). The mistake costs extra fees and time but doesn’t result in lost funds. Always verify the selected network before confirming any send transaction.
How do I know if a website is safe to connect my wallet to?
Verify safety through multiple checks. First, confirm the URL is spelled correctly—phishing sites use similar-looking domains (gpufl0w.app instead of gpuflow.app). Second, check for HTTPS and valid security certificate. Third, bookmark legitimate sites and use bookmarks rather than searching each time. Fourth, research the platform through community channels (Discord, Reddit, Twitter) before connecting. When the connection popup appears, MetaMask shows the requesting website—verify this matches your expectations. Remember that wallet connection only reveals your address and balances; actual fund transfers require separate approval. Start with small amounts on new platforms until you’ve verified legitimacy through successful transactions.
What does “approving” a token mean?
Token approval grants a specific smart contract permission to transfer a specific token from your wallet. This is separate from actually transferring funds. When you deposit USDC to a GPU rental platform, two transactions occur: first, you approve the platform’s escrow contract to access your USDC; second, you confirm the actual deposit. Approval is required because of how blockchain tokens work—contracts cannot pull tokens from your wallet without explicit permission. You can approve a limited amount (must re-approve when depleted) or unlimited amount (convenient but requires trusting the contract). Approvals can be reviewed and revoked anytime at sites like revoke.cash.
Why did my transaction fail?
Transaction failures have several common causes. Insufficient MATIC for gas is most common—you need MATIC to pay fees even when transacting in USDC. Insufficient token balance (trying to send more than you have) also causes failures. Interacting with a contract incorrectly (wrong network, incompatible parameters) triggers failures. Network congestion occasionally causes issues though this is rare on Polygon. The error message in MetaMask usually indicates the cause. Check MATIC balance first (most common issue for new users), then verify you’re on the correct network, then try reducing the transaction amount.
Can I recover my wallet if I lose my password?
Yes, if you have your seed phrase. Losing your MetaMask password means you cannot access the wallet on that specific device, but the seed phrase provides complete recovery. Uninstall MetaMask, reinstall it, select “Import using Secret Recovery Phrase,” enter your 12 words, and create a new password. Your wallet—including all balances—is fully restored. However, if you lose both your password and seed phrase, recovery is impossible. No company, support team, or technical process can recover a wallet without the seed phrase. This is why secure seed phrase backup is absolutely critical before adding any funds to your wallet.
How long do transactions take on Polygon?
Polygon transactions typically confirm in 2-5 seconds under normal conditions. You’ll see the transaction appear as “pending” briefly in MetaMask, then change to “confirmed.” Occasionally during high network usage, confirmation might take 15-30 seconds. If a transaction remains pending for more than 5 minutes, something is likely wrong—insufficient gas price, network issues, or nonce problems. You can “speed up” stuck transactions in MetaMask by clicking the pending transaction and selecting “Speed Up,” which resubmits with higher gas. Compared to Ethereum mainnet (30 seconds to several minutes) and Bitcoin (10-60 minutes), Polygon’s speed is essentially instant for practical purposes.
Ready to set up your wallet? Start by downloading MetaMask from metamask.io, then follow the steps in this guide. In fifteen minutes, you’ll be ready to rent your first GPU with cryptocurrency on GPUFlow with no identity verification required, no lengthy account setup, and no credit card needed.